I've been working on and thinking about bike & trike design for a while now, building and riding some pretty strange contraptions in the meantime. This one is pretty close to the end goal for one line of development - a general purpose utility trike that is comfortable, stable at any speed, and capable of hauling large, heavy loads when necessary. Furthermore, it can be built without a welder or other specialized tools!
This trike is perfect for commuting and grocery runs... or a 400 mile fully-loaded tour. Without a load it's nimble and speedy, but I've also hauled 100+ lbs of cargo on the trike while towing a trailer loaded with even more. It can carry cargo directly on the rear frame, in stacking plastic tubs that fit on the rear, or (potentially) in a custom-built cargo box.
Some of the basic features:
- Recumbent - essential for comfort, especially on long rides at low speed!
- Trike - it can crawl up steep hills with heavy loads without any risk of falling over.
- Tilting trike - it can take sharp turns at speed without tipping by leaning into the turn.
- Duschar Joint tilt mechanism / handlebars control tilt - this eliminates the need for a complex mechanical tilt lock to keep the trike upright at low speeds or when stopped
- Moving Bottom Bracket Front Wheel Drive - driving the front wheel means I can use a standard-length chain without any special routing. It's quieter and more efficient than most recumbents. MBBFWD trikes are steered with the feet, so the handlebars are free to control tilting.
- Long wheelbase - offers better traction than many other front wheel drive bikes, which are often shorter
- Large cargo bed - can fit oddly shaped objects, and accepts a premade plastic tub that serves as a "trunk"
- Can be built without specialized tools - I did most of the construction with a hacksaw, a drill press, a power drill, and a handful of other common tools. No welder, lathe, or mill. No composites. No jigs. Mostly standard, commonly-available parts (except the rear axle, but it should be easy to substitute for that).
This trike owes its design to several influences:
- The tilting mechanism comes from the classic FlevoTrike
- The construction method is inspired by both the N55 XYZ Spaceframe Vehicles and the TriBolt
- The seat is similar to the the one Mirek used for this cargo trike
- The steering geometry is based on the Python Lowracer
- The idea of building a flatbed that also fits a premade plastic tub "trunk" came from Bikes at Work
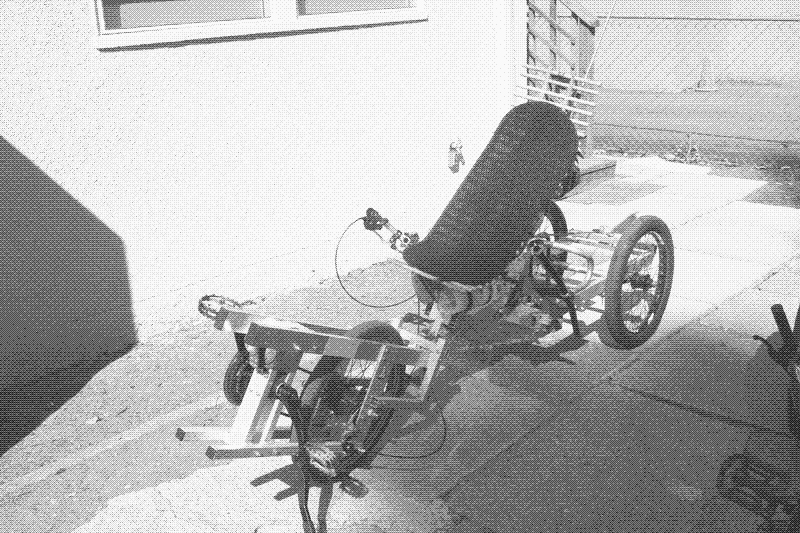
Below is an overview of the trike from front to back.
Front End
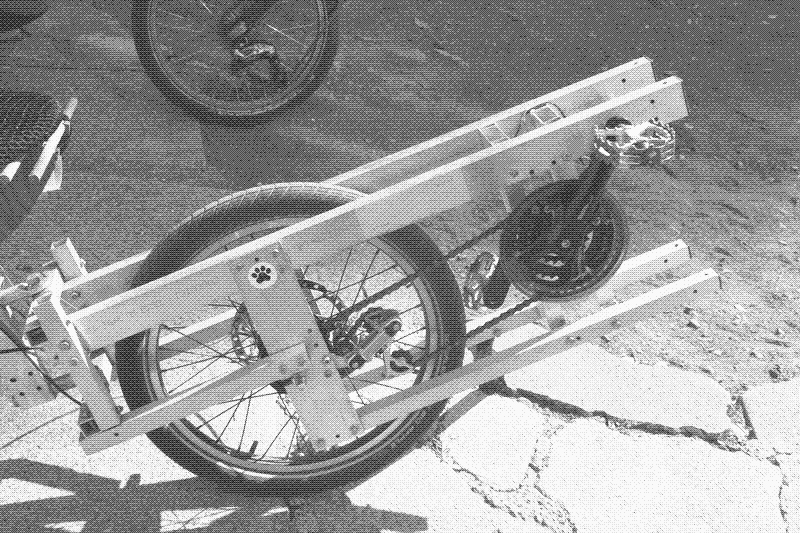 Image: The front end of the trike - steering and drivetrain are all up here!
This front end assembly is very much inspired by the N55 XYZ SpaceFrame designs, and it's also very much overbuilt! Next time I'll try a single set of horizontal rails - maybe 1x3" instead of 1x2" tubing - without the whole lower set of parallel rails. Possibly some diagonal bracing down to the dropouts?
Bottom Bracket
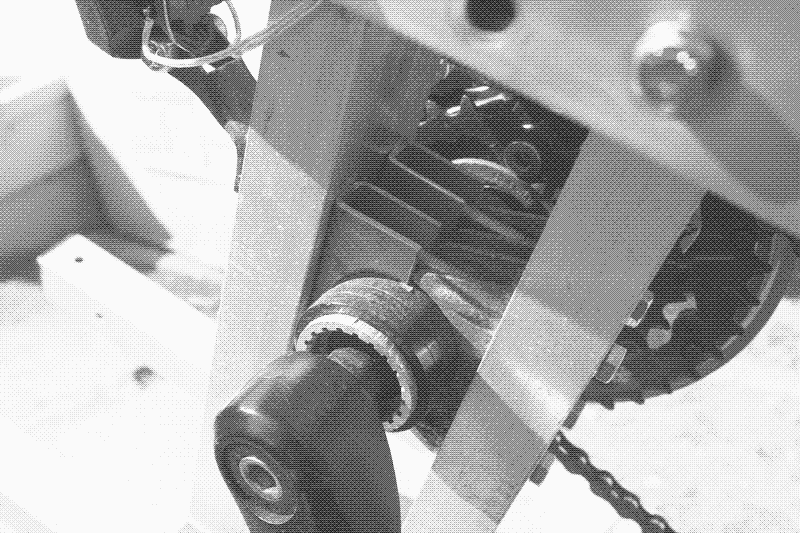 Image: A bottom bracket shell is clamped between two rectangular aluminum tubes with the spacers from clamping u-bolts.
This is... inelegant. The bolts clamping the bottom bracket shell are overtight and still the assembly creaks under high loads. Maybe N55's sandwich design is better.
I think in the future this is one part I'd have custom machined or welded, unless I learn or devise something more effective. Even a bottom bracket cut from an old frame and welded to a plate that I can bolt or clamp to the frame tubes would probably work better.
Disc Brake
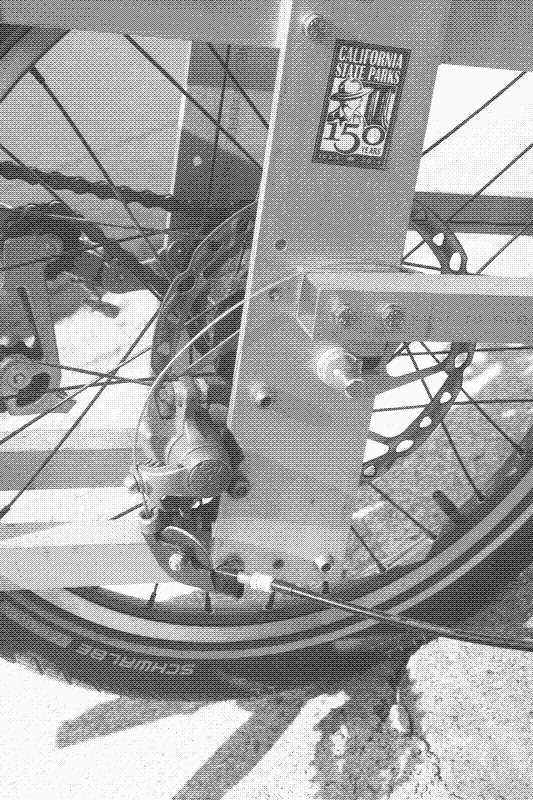 Image: Disc brake on the front wheel.
This proved to be a very effective way of attaching the brake - just bolt it's adapter bracket directly to the 1/4" aluminum plate that also serves as the dropout, with some material cut and filed away to accomodate the caliper.
The only really tricky part was drilling the mounting holes in the right places. I used both a template from the internet and the caliper itself (clamped to the rotor by pulling the brake lever) as guides for hole placement.
The travel agent is necessary because my parking-brake lever is for old-style cantilever brakes and has the wrong pull ratio for modern disc or V brakes.
Steering Pivot
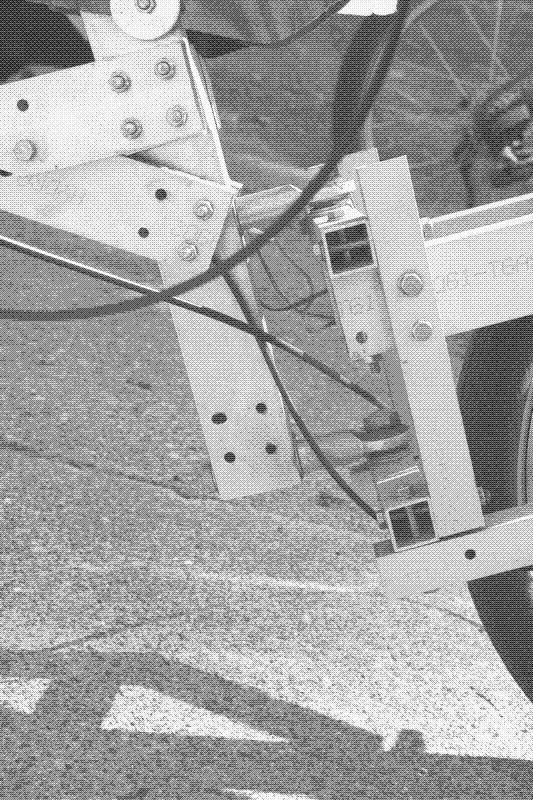 Image: Two large rod end bearings connect the front and rear subframes to act as the "headset" or steering pivot.
I'm still not sure if rod end bearings are the best choice for the steering pivot, but they seem to have survived their first several hundred miles (and over six months) pretty well. I occasionally apply chain lube to them, and I keep meaning to make sleeves out of old inner tubes to provide some weatherproofing. A fender would probably help too; the wheel kicks up a lot of road gunk.
The rod ends are very easy to fit, install, and replace on square tubing!
Center Section
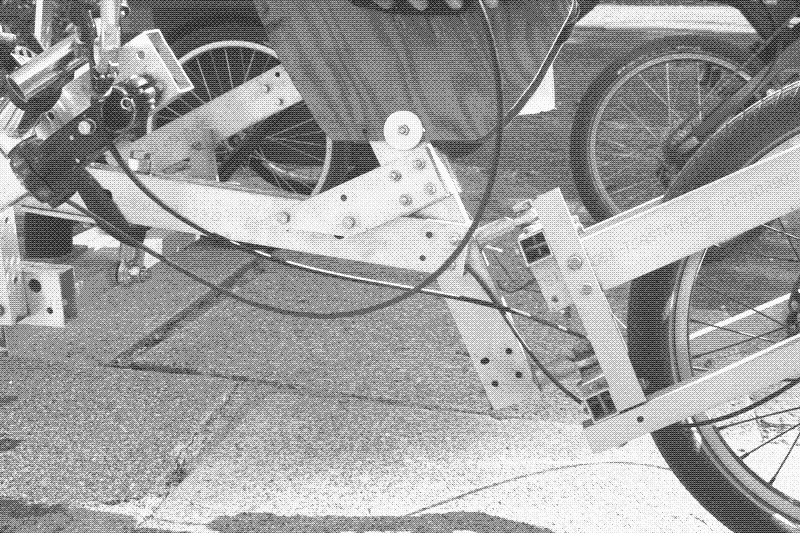 Image: The central part of the frame - seat mounts here.
Triangulation - with beams sandwiched between each other as shown heare - proved very effective! Even a tiny diagonal brace like the one below the seat stiffens the connection between the horizontal tubes and the tube that the rod ends anchor to remarkably well! I guess I shouldn't be surprised, since triangulation is such a big deal in conventional bike design.
Seat
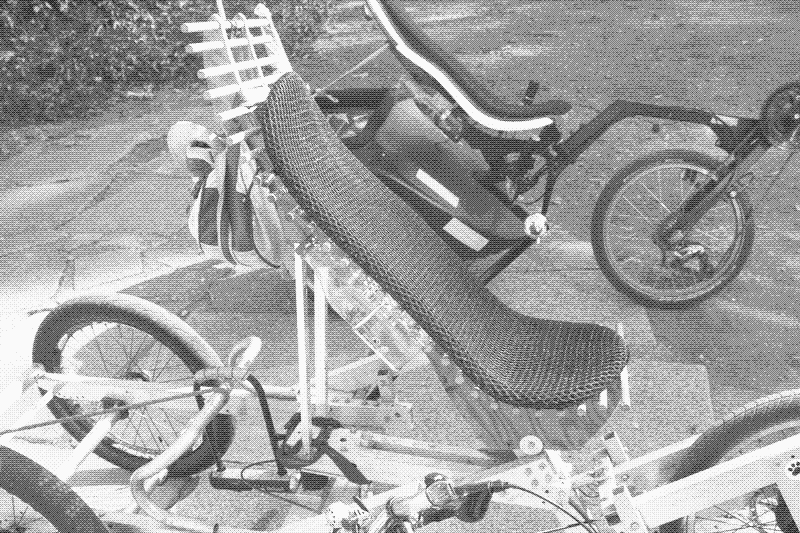 Image: Seat made from two parallell plywood profiles with dowels across them.
This is a blatant copy of the HiBone based on the plans Mirek published for this cargo trike. There's another good HiBone clone here.
It's just some 1/2" (I think) plywood and a bunch of 1/2" oak dowels with a ventist pad on top. It bolts onto the frame easily, can be built with a jigsaw and a drill, and you can mount flags, bottle cages, and other accessories with wood screws anywhere you like!
Mirek's template (zip file) turned out a little large for my 5'8" - next time I'd scale it down or try to make my own teplate based on the FlevoTrike seat.
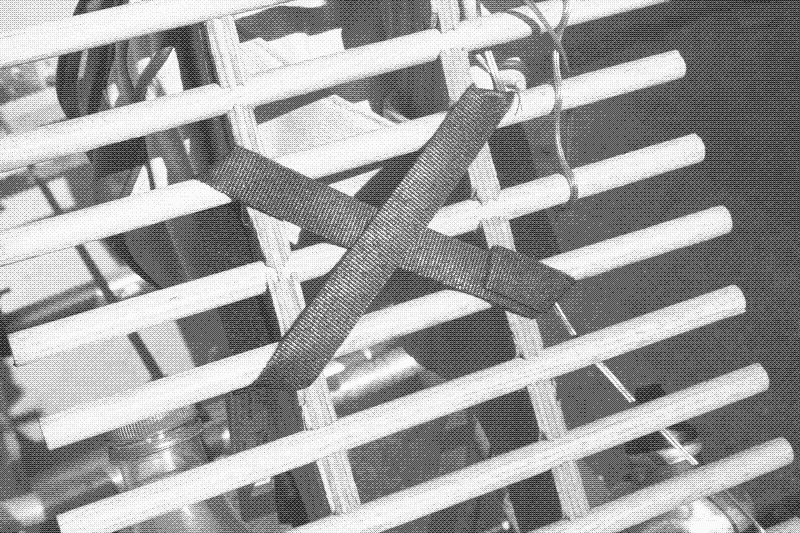 Image: Close-up of the seat.
When constructing the seat, I first drilled holes in the plywood (using a drill guide, drilling through two pieces of plywood clamped together) and then cut the outlines with a jigsaw. I wasn't sure how close to the holes I needed to cut to avoid uncomfortable ridges. The result, it turns out, was probably closer than it needed to be. I think 1/16" or maybe even 1/8" (1-3mm) away from the holes would have been fine, and they would have a better friction fit. The black X is a piece of velcro tie-down strap looped into the seat frame to catch the velcro on teh back of the ventist pad.
Duschar Joint Tilting Mechanism & Comparison With Flevotrike
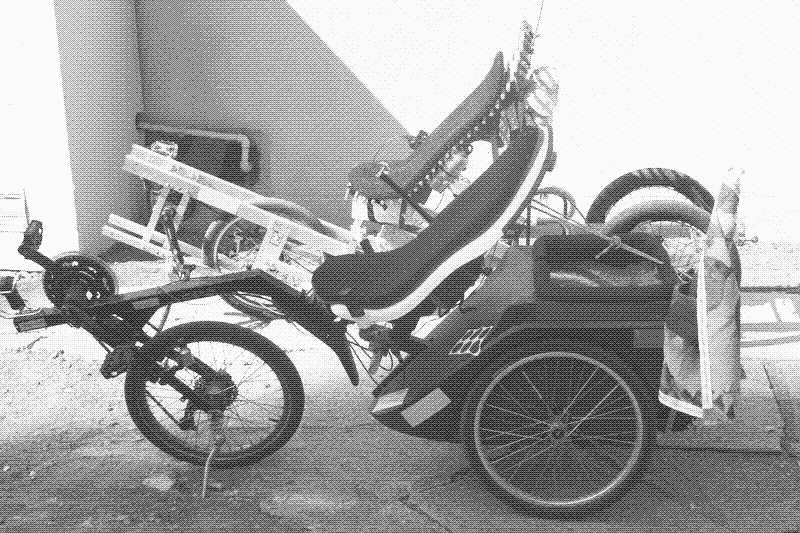 Image: FlevoTrike in foreground, my trike in the background.
The FlevoTrike in the foreground was my first experience with a "Duschar Joint" tilting mechanism. I've known for years that I wanted to build a similar tilting trike, and one of the things I most wated to change was the wheelbase. The FlevoTrike struggles with steep hills and loose or slippery surfaces. Increasing the wheelbase on this trike is a major improvement. It moves the rear wheels further back and thus puts more of the rider's weight on the front wheel. This trike doesn't slip or spin out on steep hills, and it handles well on gravel.
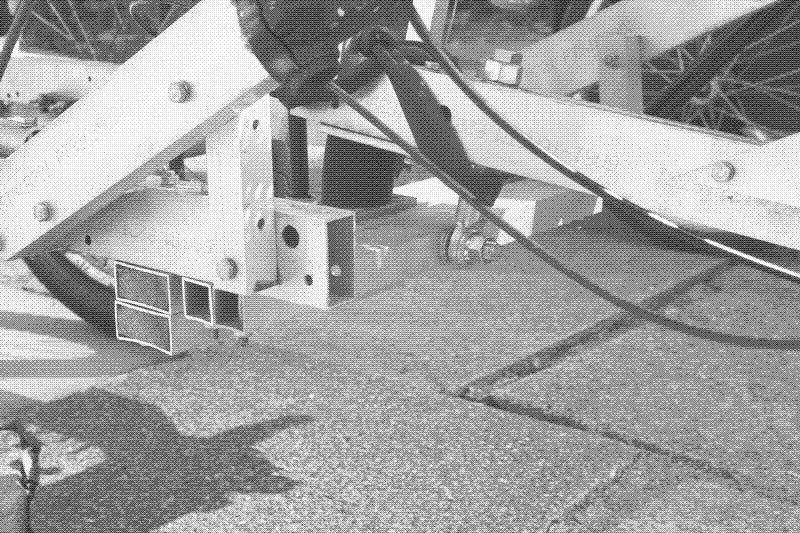 Image: The Duschar Joint is a tilt mechanism made from a rod-end bearing (or other ball joint) and a rubber block.
The Duschar Joint is a simple tilt mechanism: It allows the trike to lean into high-speed turns, but the rider can easily keep it upright when stopped or moving slow with only a light touch on the handlebar. No need for complicated tilt-locks that will tip the trike if they're engaged or disengaged at the wrong moment!
The rod-end is one pivot point, and the rubber block serves as a second pivot point while also putting a bit of a damper on the tilting action.
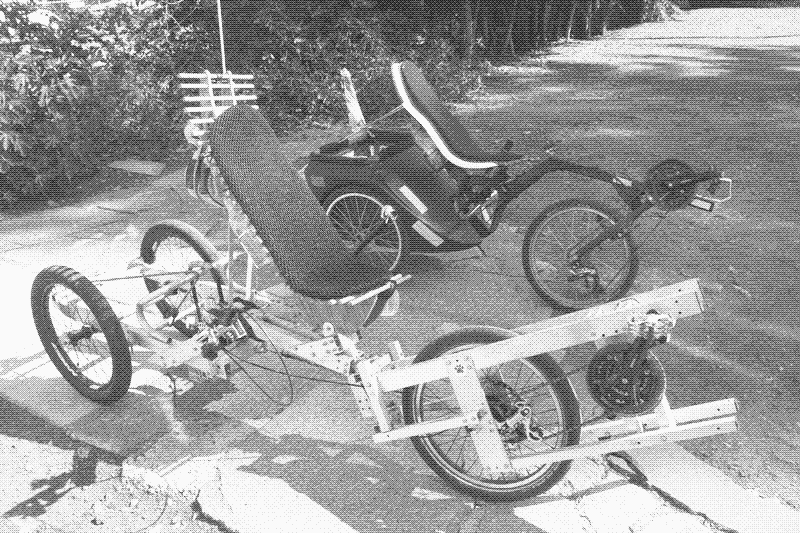 Image: FlevoTrike & bolted aluminum trike, front right.
One lesson I learned from this trike is the importance of Duschar Joint placement. On the Flevo, the Duschar joint is almost right under the bottom of the seat and not far from the ends of the handlebars.
My design places the Duschar Joint further back, roughly under the rider's head - well behind and below the ends of the handlebars. A line drawn through the rubber block and the pivot point of the rod end on my design points slightly down. This line, around which the two halves of the trike pivot, is pretty far from tha handlebar grips. This means the seat has a lot more side-to-side movement relative to the grips than it does on the Flevo, and constrains the range of tilting motion.
Were I to redesign this trike, I'd move the Duschar Joint forward and possibly up to better match the Flevo.
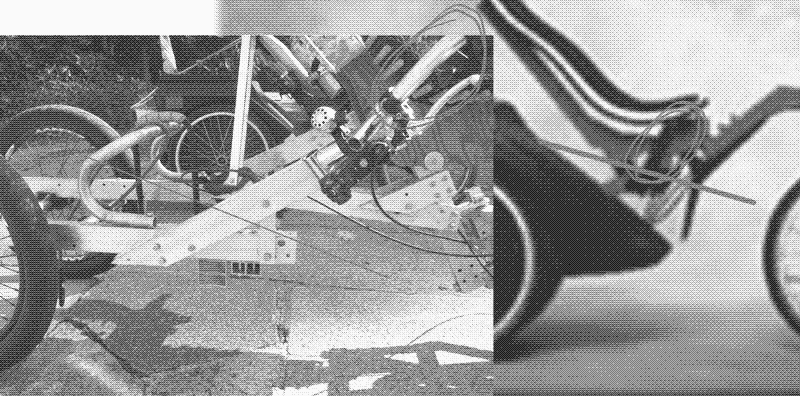 Image: Comparison of tilt pivot line and handlebar location.
The comparison photo above may help clarify what I mean about the relative location of the Duschar Joint and the handlebar (though you'll probably need to click "View Full Image" to make sense of it, since it relies on colored lines). The red lines pass through the rod-end-and-block that make up the Duschar joint, and show approximately the axis around which the front part of the trike tilts. The handlebar grips are circled in green. On my trike (left) the grips are quite farfrom the pivot axis. On the FlevoTrike (right) the grips are right next to the pivot axis. The FlevoTrike layout is noticeably better!
Handlebars
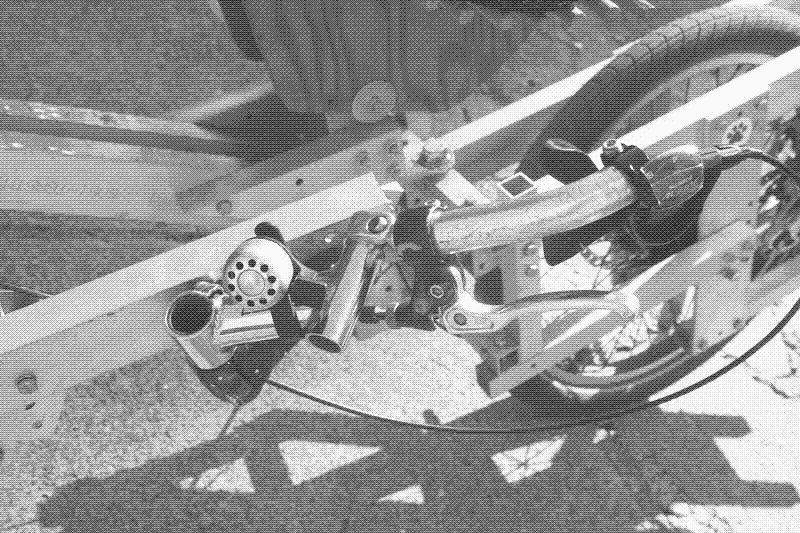 Image: The janky right handlebar.
This is a hodgepodge of parts from old projects that works fine... but I wouldn't do it this way again!
Still, it's robust, it holds the brake lever (with parking brake button!), shifter, and a bell.
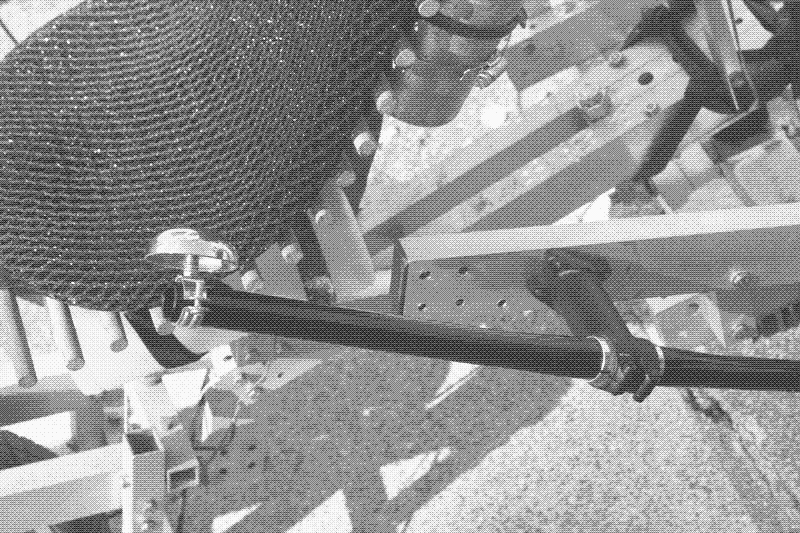 Image: The elegant handlebar. (Complete with elegant bell.)
This side is just a regular flat bar attached with a threadless stem. It's much more elegant and easier to recreate in the future. There's no need for the bar to extend down toward the rear of the trike (to the right in this photo), I just didn't feel like cutting off the extra. This way it could still be a regular handlebar again!
Note that the bar is clamped by the part of the stem that would normally clamp around the steer tube (this stem needed a shim to fit the handlebar). It took the very patient and helpful folks at Kenton Cycle Repair a while to find a stem that would fit this way, but it was important because...
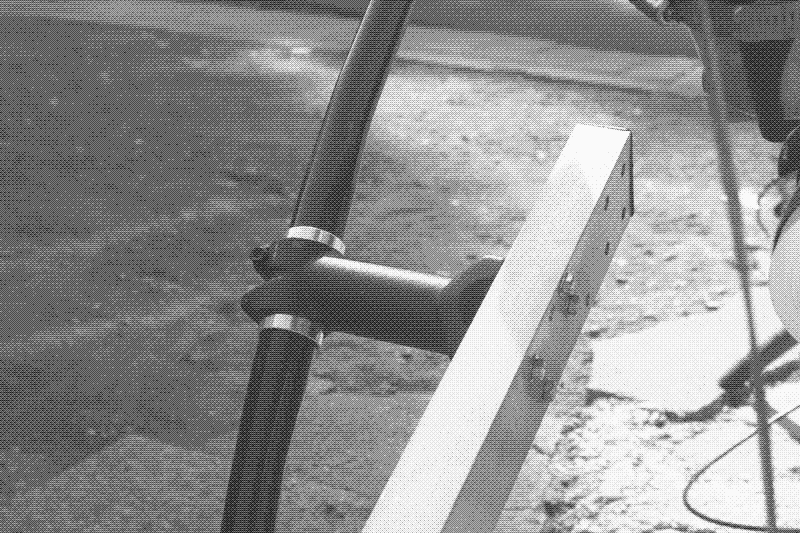 Image: Backside of the elegant handlebar attachment. Simple, yet effective!
...the other end of the stem has it's faceplate removed so it can bolt directly to the rectangular support tube. I doubt a 2-bolt stem would suffice here. This attachement is remarkably robust, and I wouldn't hesitate to use it again.
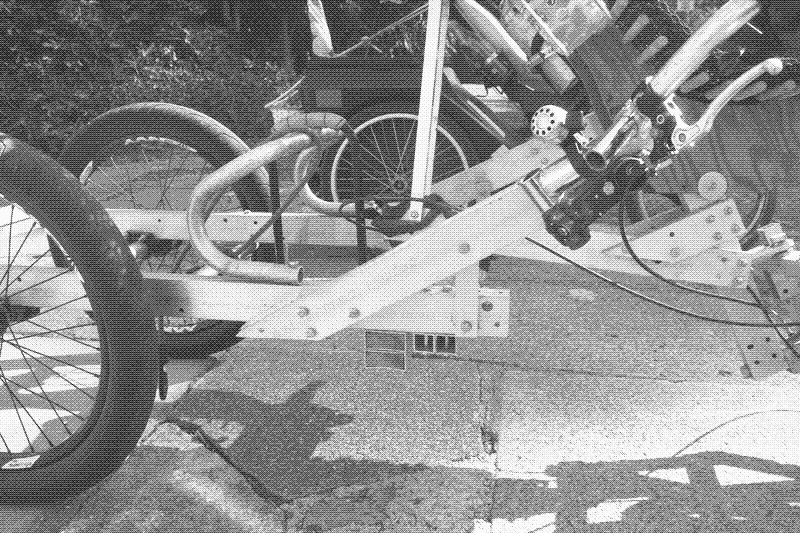 Image: Triangulated brace for handlebar attachment.
Not sure if this little triangulated brace for the handlebar is overkill or good design. I could probably have moved the Duschar Joint forward (as mentioned above) and mounted both handlebars directly to the side rails of the rear end using threadless stems the way I did on the left side.
Also, note the old aluminum drop bar that happened to be a perfect witdth. It's a crossbar, a holder for the trunk, and a handy tie-down point!
Rear End, Rear Wheels, & Dynamo Lights
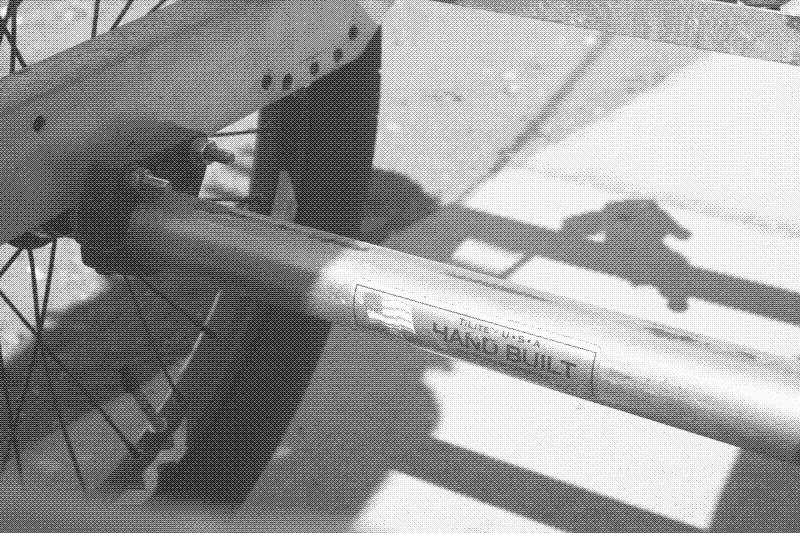 Image: TiLite wheelchair axle salvaged to use as rear axle/crossbar.
This was a bit of improv. I had scrounged a damaged TiLite wheelchair out of the Bike Farm scrap bin, so I (mis)used it's rear axle and the associated brackets. It's a really nice axle! I'm sure there are better ways of doing this with more readily available components, but it's what I had handy at the time.
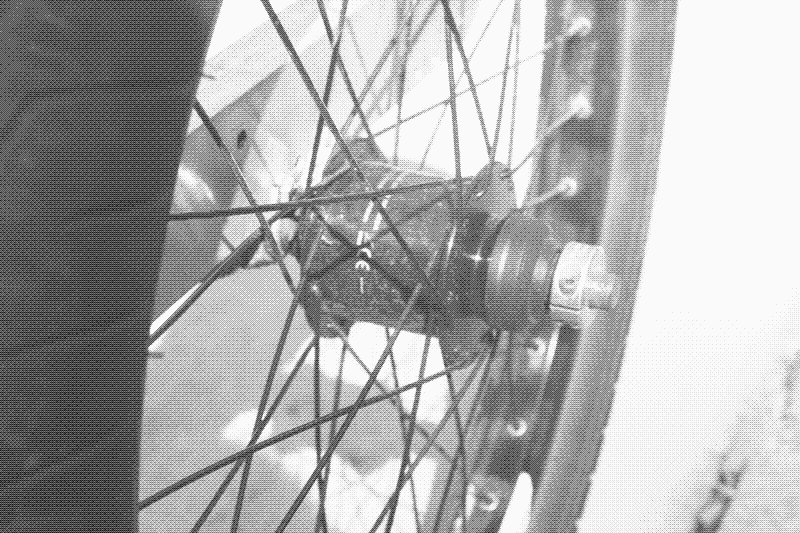 Image: One of the rear wheels has a dynohub for powering the lighting system.
The rear hubs are Shimano Metreas, with a dynamo version on the left that powers the lighting system. They are 12mm thru-axle hubs, and the 12mm diameter steel rod they fit on runs snugly through the old TiLite wheelchair axle. Aluminum clamps on the ends of the 12mm rod hold the hubs in place. If I hadn't found the damaged TiLite chair in a scrap bin I would probably have used 20mm stub axles to attach the wheels instead. These hubs are disc-compatible, but I haven't installed brake calipers on the rear yet.
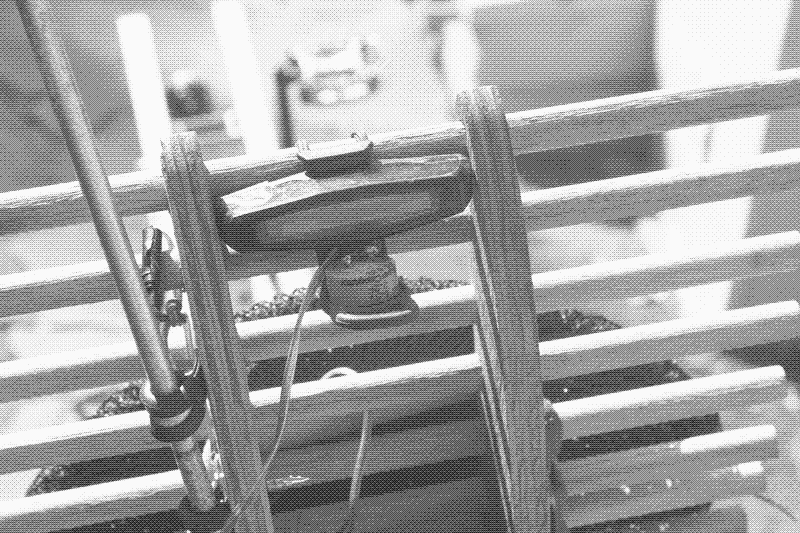 Image: Formerly-rechargable taillight converted to generator, with a capacitor dangling below it.
This was once a USB-rechargeable taillight. By the time I found it on the side of the road there wasn't much battery capacity left. When it stopped charging I broke it open and replaced most of the electronic guts with a simple standlight circuit. It is wired to the dynohub by way of the Busch + Müller Headlight. It's very bright, and the standlight function works nicely!
Trunk
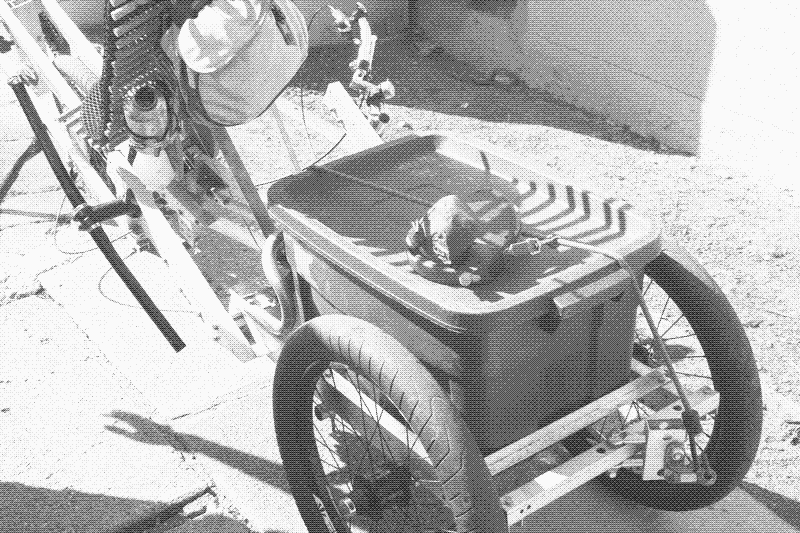 Image: Blue plastic tub on the back of the trike.
While neither as streamlined nor as capacious as the FlevoTrike trunk, this plastic tub fits nicely on my cargo bed. It's also better for stacking large items - boxes or other tubs can sit right on top. Plus, unlike with the Flevo, I can take it off the trike and carry it into the house for (un)loading.
Other Photos
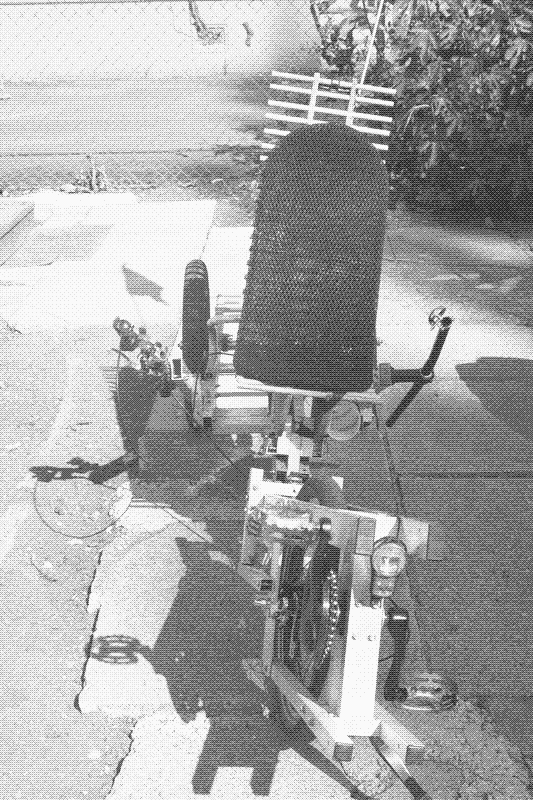 Image: Front view.
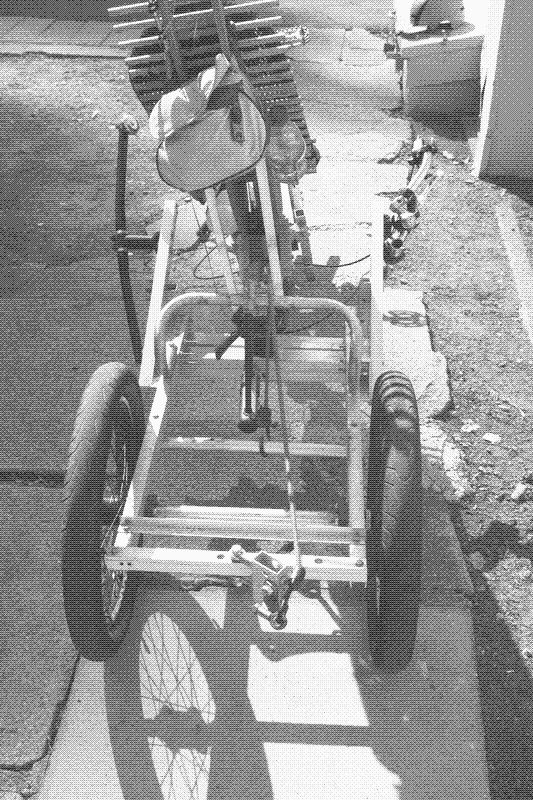 Image: Back view.
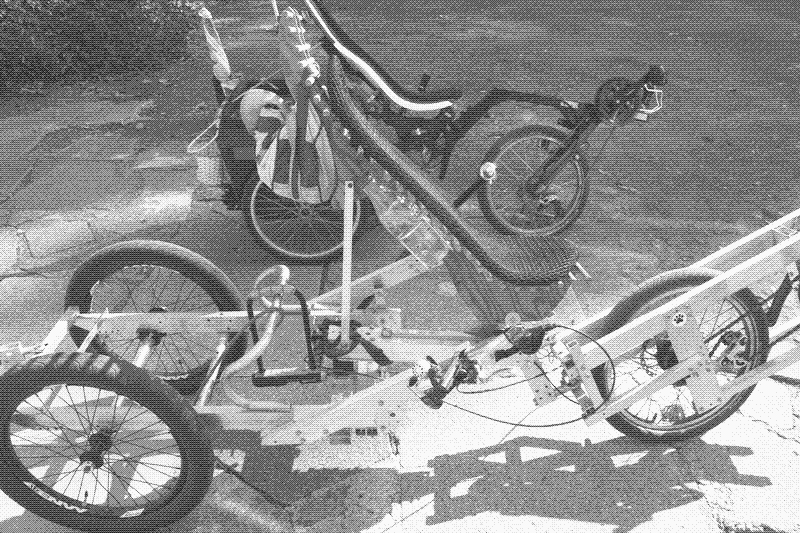 Image: FlevoTrike and the new trike side-by-side.