At some point in 2021 I made a pair of sandals from old bike tires. This summer they finally wore out so badly I had to retire them, and a few weeks ago I made version 2.0 - now with closed toes and nicer ankle straps! Both versions are "minimalist" or "barefoot" shoes - they have no stiffness, no arch support, and only a thin layer of rubber between your foot and the ground. You have to walk differently - toe first instead of heel first - and use leg and foot muscles to maintain your arch. It takes some practice, but I find it very comfortable and think it encourages me to walk with better posture.
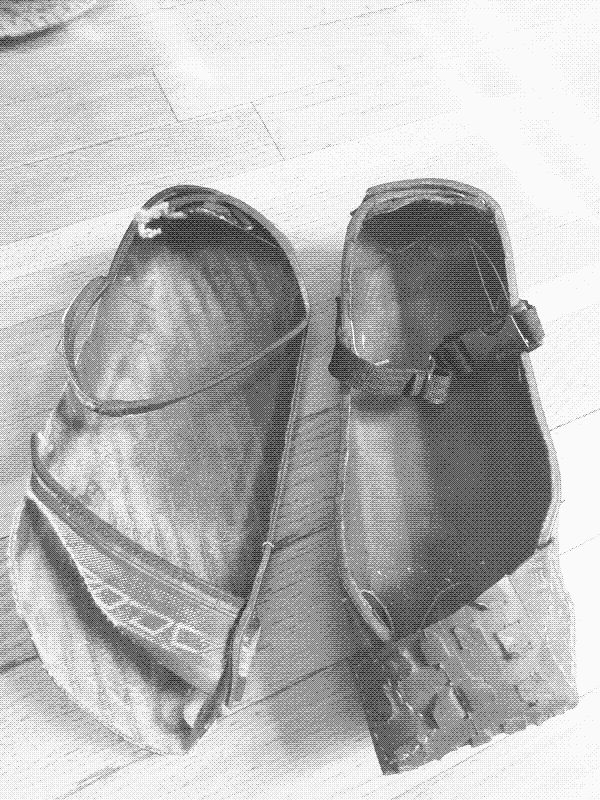
Version 1.0
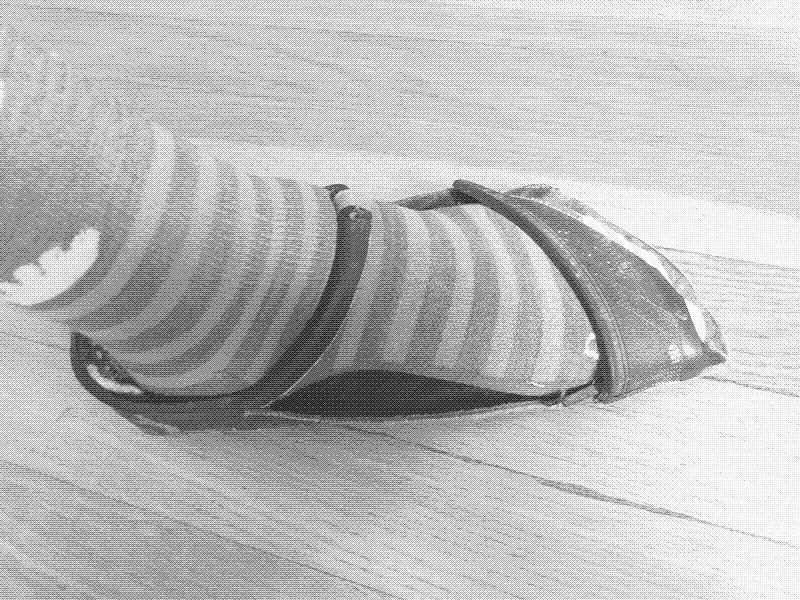 Image: Version 1.0 - minimalist sandals
For the first version, I tried to use only the tires themselves and nearly succeeded! The main downside to these is that with a sole barely 2mm thick and no toebox, stuff gets into the shoes way too easily. Rocks and sticks, yes, and also water - these quickly soak your socks on dewy grass, and cold puddles are out of the question. They also flap around a lot. They did work well for wading around in rivers and the ocean when it was warm enough for wet feet to be comfortable, though!
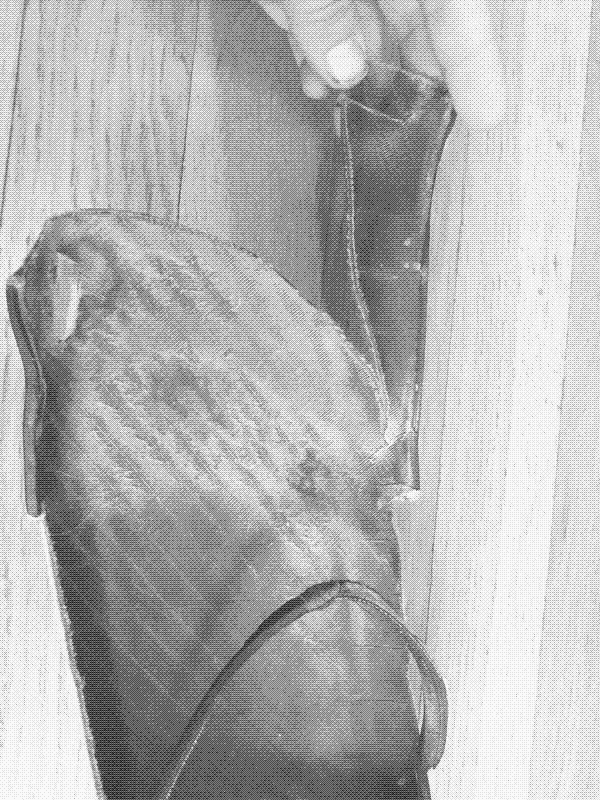 Image: Kirigami?
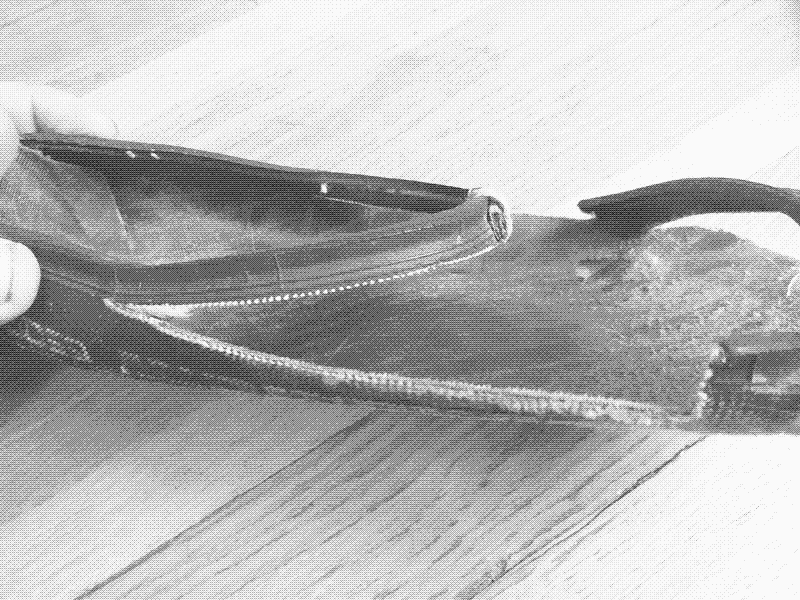 Image: Ankle straps are also cut from the same piece of tire!
The pattern for version 1.0 is pretty straightforward. I needed about 14" (36cm) of... I think a "2.5 inch" folding-bead mountain bike tire? (depending on the shoe I wear a US men's 8-9, which is apparently a European 41-43).
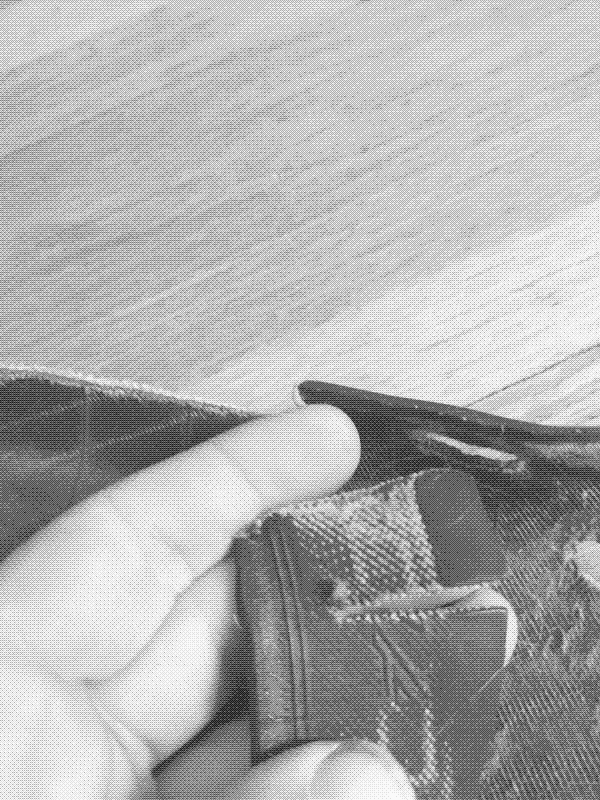 Image: Almost-new-sew construction
I wanted to minimize construction difficulty, so the heels and toe-straps are both secured with tabs that fit into slots cut in the tire. You have to get the size matched correctly or your tabs will fall out! Tab-and-slot placement also determines the size and fit of the shoe, so there is a lot riding on this step!
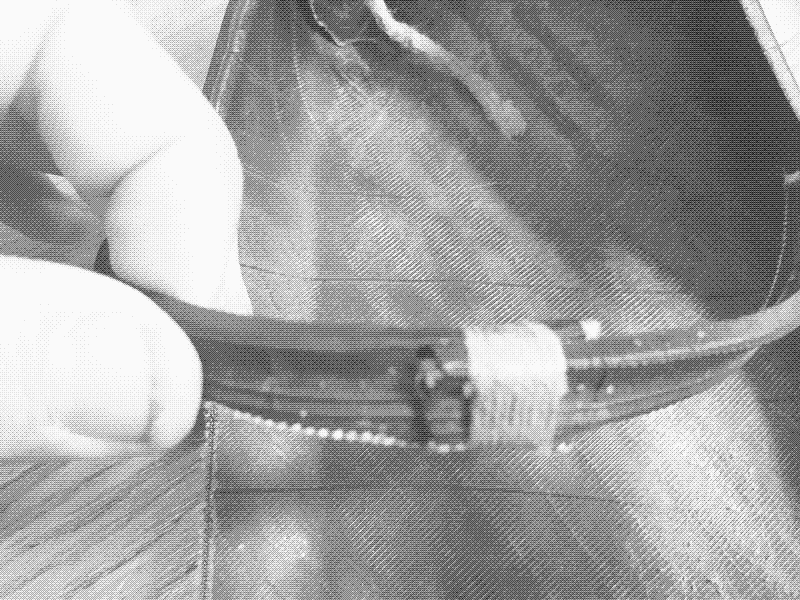 Image: The only part that isn't made of tire
Securing the two ends of the ankle strap did require stitching them together where they overlap, and then wrapping the heavy thread around to reinforce the joint. One of these joints held up perfectly, but the other one had less overlap. It occasionally came apart and needed to be tightened or repaired.
Version 2.0
 Image: Version 2.0 - toebox time!
To reduce flappiness and increase waterproofness, version 2.0 has an actual toebox! While it might be possible to construct this with tabs-and-slots, I decided to actually stitch the things together this time. I used a Speedy Stitcher sewing awl which is not at all speedy compared to normal sewing in fabric, but it is marginally faster and more convenient than pre-punching each hole with an awl and then going back and sewing everything with a needle. I think that is probably the best alternative for sewing tires.
The ankle straps on version 2.0 are non-tire material... but they're still bike junk! They are old helmet straps, complete with buckles. Having worn the shoes for a couple weeks, I now realize that the flexibility of the shoe renders quick-release buckles unneccessary. An adjustable strap would have been perfectly adequate. I mostly get them on and off by just forcing my foot through the opening without opening the buckles. The heel gets squished, but unlike most shoes the heels are flexible enough to do that without noticable damage, and the sole will almost certainly wear out first anyway.
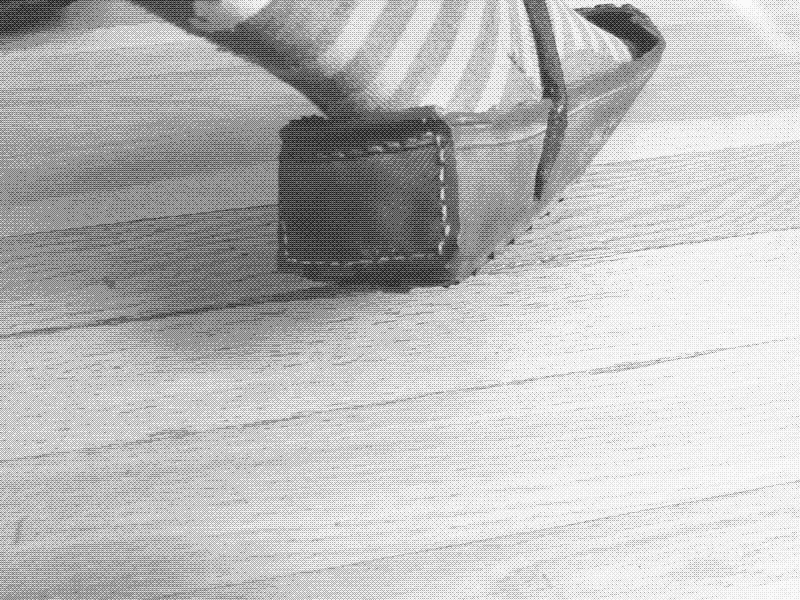 Image: Heel!
Speaking of heels, the heels on these came out way wider than they needed to be. I did almost all of the design and fitting by taking an 18-20" (45-50cm) length of wide folding-bead MTB tire with knobs cut off and wrapping it over my foot in various ways until it felt promising. I was wearing heavy socks at the time, so the fit is a little loose. I don't know if a more snug fit would be better - these do tend to move around on my feet enough when walking that thinner socks get bunched up around the heel.
Materials & Prep
 Image: De-knobbed MTB tire
I think the ideal material for these would be a wide semi-slick folding-bead tire. Unfortunately, those are really hard to find! Instead, I scavenged (with permission) some discarded knobby folding-bead MTB tires from bike shop dumpsters and cut the knobs off, which is enormously laborious and time-consuming. If anyone has tips on how to do it quickly, I want to hear about them! I use either a sharp pair of scissors or a knife. Neither one is idea. Someone with much narrower feet might be able to leave the knobs on, but that doesn't work for me. My feet are wide enough that they overlap the knobs on either side and it's like walking on a rubbery balance beam. You might also be able to find really worn-out tires with the knobs mostly gone. I find that knobs up to about 2mm (less than 1/8") are fine.
A little more about choosing tires:
- Wide tires give you more material to work with! 2.5" is a reasonably large tire width, 2.95 is about the largest in common use on mountain bikes (not the actual width of the tire material when you lay it out flat, but the width written on the side of the tire, usually right after the diameter, e.g. "26x2.5"). Fat bike tires can get up to 5", but they are still much less common. Sufficient width is especially important for a design like version 1.0, where the straps cut into the width of the final shoe.
- "Folding-bead" or "kevlar-bead" tires are crucial! The "bead" is the thicker, non-stretchy part around the edge of the tire that hooks onto the rim (labelled "4" in this photo). In most bicycle tires it is made out of steel cable encased in the rubber of the tire. Some tires instead use a kevlar or other high-strength fiber cable instead of steel, which provides greater flexibility so the tire can be folded up and carried in a repair kit. These tires are usually more flexible overall, allowing them to more easily conform to the shape of your foot instead of being stuck in the curvature of a bike tire.
- You only need a few linear feet of tire to make a pair of shoes, but get the largest-diameter tire available anyway, because it will have less curvature and will conform more easily to the shape of your foot.
That's all I have to say on tire shoes for now, but I expect to continue making them and will try to add more information as my technique improves!